From Starter to Slice
Updated: 2 days ago
✨ Just a quick note: This post contains affiliate links. If you make a purchase through them, I may earn a small commission at no extra cost to you. Thank you for your support!
My Sourdough Journey
When I baked my very first sourdough loaf, I’ll admit I was intimidated. A bubbling jar of flour and water didn’t seem like the kind of thing that could turn into a golden, crusty loaf of bread. But once I took the leap, I realized sourdough wasn’t just about bread; it was about slowing down, learning patience, and celebrating the small wins along the way.

The Beginning: My Starter
It all began with a jar on the counter. Every morning, I fed it a simple mix of flour and water. At first, it looked lifeless, but then bubbles! That was the moment I knew my starter had come alive. It became a little ritual: feed, watch, wait, and smile as it grew stronger each day.
(Tip: If you’re just starting out, a glass jar and kitchen scale make the process so much easier. They quickly became two of my favorite tools.)
I started off with the simple 1:1:1 (120g water, 120g, starter, 120g flour) feeding ratio at first, which worked yes but started to turn the starter into more of an acidic starter. Then I discovered a 1:3:5 (40g starter, 125g water, 145g flour) ratio. This allowed a slower rise, creating an even stronger starter that worked best for my bread.
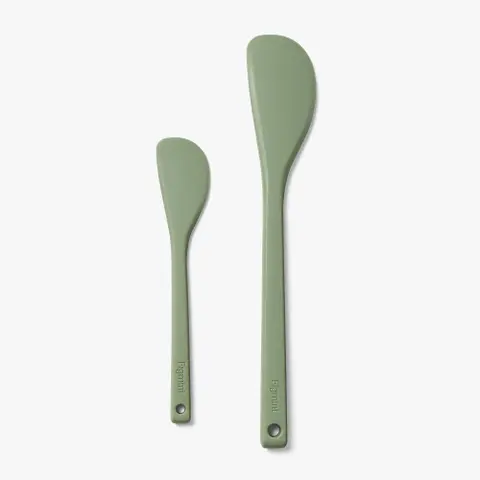
Here are some of my most trusted tools that I use for my starter!!



Learning Patience in the Process
Sourdough doesn’t happen in a hurry, and that was one of the hardest lessons for me to learn. I used to peek under the towel every 20 minutes, wondering why my dough wasn’t growing. Eventually, I realized sourdough rises on its own timeline. All I could do was give it the right conditions and trust the process.
Stretching, folding, waiting those simple movements connected me to bakers who’ve been doing the same thing for centuries. It felt grounding.
I've tried all sorts of methods for feeding, stretching, and bulk rising. At first, I would feed the starter around 5 pm and wait for it to double by 9 pm. Then mix all the dough together (starter, flour, water, and salt) do a few stretches and finally leave it in a warm place to double overnight.
This worked until I realized by the next morning it was too bubbly and simply overdone. I also had never done the second rise in the fridge. This is okay because everyone has different methods for making sourdough.
Now I feed my starter the night before (40g starter, 125g water, 145g flour) because it takes longer to rise do to the 1:3:3.5 feeding method. Then, by about 3 o'clock the next day, it's more than doubled in size and is ready to be mixed. Here is my recipe:
200g starter fed
700g water
1000g flour
25g salt
Mix all the ingredients except the salt in a bowl until shaggy. Cover with a towel for 30mins. After 30 mins, add the salt and mix the dough well. Let sit for another 30mins and perform 3 stretches and folds every 30mins. Once done, cover with plastic wrap and a towel until doubled in size. Shape and place in bannetons in the fridge until morning.
Here are some of the most trusted tools that I use for my sourdough!!

Sur La Table Round Banneton, 9" 
Sur La Table Silicone Dough Scraper 
Sur La Table Flour Sack Towels, Set of 3 
Sur La Table Nonstick Silicone Pastry Mat, 18" x 25" 
Sur La Table Stainless Steel Mesh Sieve 
Stainless Steel Mixing Bowl 
Artisan Bread Baking Crock and Dutch Oven 
USA Pan Large Nonstick Bread Loaf Pan 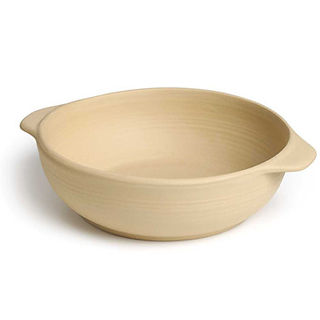
Bread Baking Bowl 
Round Loaf Lifter
Shaping and Scoring: A Creative Outlet
Once the dough was ready, I got to shape it, sometimes round, sometimes oval. My favorite part quickly became scoring. At first, I was nervous to make cuts in my dough, but once I held a bread lame in my hand, it felt like art. Each loaf became a canvas: leaves, swirls, or just a single bold slash that let the steam escape dramatically in the oven.
For me, shaping is the most enjoyable part of the entire process. It's a hands-on experience that really engages you with the dough. Initially, shaping was challenging, but once you master it, it becomes quite enjoyable! There are numerous techniques for shaping the dough. The key aspect is creating tension while rolling to achieve a crispy crust after baking.
Here are some of my most trusted tools that I use for shaping and scoring my Sourdough!!
This Bread Lame was actually the first tool I purchased to make sourdough.
Sur La Table Nonstick Silicone Pastry Mat, 18" x 25" Sur La Table Stainless Steel Mesh Sieve 
Sur La Table Bread Lame Sur La Table Silicone Dough Scraper
That First Slice
There’s nothing like the sound of sourdough crackling as it cools. I’ll never forget slicing into my very first loaf: the tangy aroma, the chewy crumb, the butter melting into each bite. That slice was proof (literally!) that all the waiting and learning had been worth it.

Waiting for it to cool is the hardest part of the journey. Sourdough needs to be cool to the touch before cutting into it. If you cut it while it's still warm, it can create a gummy texture inside. They say to wait anywhere between 1-2 hours before cutting into it.
Now, every loaf I bake feels like a small celebration. From the moment I feed my starter to the time I cut that first slice, it’s a reminder to enjoy the process, not just the result.
Sharing bread with others around me is the ultimate joy. Watching their excitement as they get this fresh homemade loaf of bread!
Printable Sourdough Recipe Card
Here are some printable recipe cards to assist you in your sourdough baking journey. Each card includes essential information and steps to help you create delicious sourdough bread.
Basic Sourdough Bread Recipe.
If you give this recipe a go, I'd love to hear about your results. Comment below. Happy baking!


Comments